I recently posted on social media about how I restarted making kombucha, and I got a lot of questions and requests for the recipe! I’m happy to have a place to send everyone so here we go…
You’ll need a few things to start making your own kombucha:
- A gallon glass jar (old Costco pickle jars can work, or I purchased a jar specifically for this purpose)
- Breathable fabric and a rubber band for covering the jar. Easily obtainable, but conveniently the jar I linked comes with these.
- Bottles safe for fermented beverages. I use these flip-top bottles but there are plenty of options in various sizes and styles. A twist cap is not a safe vessel. Plastic bottles may react with your kombucha so you need glass, and glass that’s too thin or doesn’t have a cap with a little give may literally explode from the pressure created by the fermentation bubbles. Please be safe.
- Tea bags. Use whatever you like, but black tea is generally better suited than green tea and it’s typically recommended to begin with black tea. I just use the inexpensive Southern staple Lipton bags.
- Sugar. You can use what you have on hand, but I’ve had much better results with less-processed organic cane sugar than with typical white sugar from the grocery store. [NOTE: YES, you NEED sugar (real sugar) to make kombucha. Otherwise the yeast and bacteria have nothing to eat, and you’ll be making a jar of wet mold. If you allow the kombucha to ferment, the sugar will all be eaten by the organisms, so this isn’t something that should spike your blood sugar in any way approaching something else that contains one cup of sugar. But of course consult your physician or licensed nutritionist if this is a concern.]
- A SCOBY (Small Colony Of Bacteria and Yeast) and some starter kombucha. This is all the good stuff that turns your sweet tea into kombucha! You can get one from a local friend or do what I’ve done three times now (because I keep stopping for months at a time and not feeding my SCOBY) which is buy this fresh and inexpensive SCOBY on Amazon. These work fabulously.
I promise this process is less intimidating/complicated than it seems at first! Just follow the recipe, making sure to pay attention to the temperature, because putting your SCOBY in too-hot liquid can kill it. Filtered water is also particularly important because the chlorine in tap water is a literal killer for fermentation.
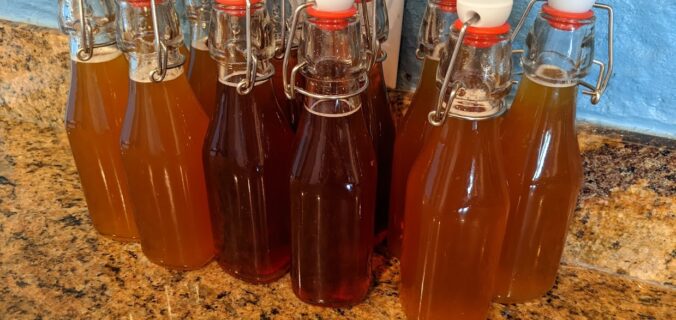
Flavoring your kombucha is very easy with infinite combinations according to whatever you like! You add any desired flavorings before your secondary, or in-bottle, fermentation. There’s a great kombucha cookbook that has many lovely flavor recipes but I often wing it with just a little not-from-concentrate fruit juice. I typically put 1Tbsp of juice in the bottom of each 8oz jar before pouring in the freshly brewed kombucha. I let it sit 1-2 days on the counter before putting in the fridge. (If you let it keep fermenting too long, you’ll get alcohol.) The bottles in the picture have just been set out for their secondary ferment, and they’re flavored with pineapple, sour cherry, and pear juice, respectively.
Enjoy making your gut-healthy, inexpensive, easy, homemade kombucha! I’ll be happy to answer any questions in the comments or on social media.
Kombucha

Notes
Ingredients
- 1 SCOBY
- 16 cups filtered water
- 12 black tea bags
- 1 cup sugar
- 1 cup natural kombucha*
Instructions
- Heat 4 cups of filtered water to around 200°.
- Off the heat add the tea bags and let it steep for 20 minutes.
- Transfer the tea into a gallon glass jar.
- Add the sugar and the remainder of the water and stir until sugar is dissolved.
- Let it sit until the temperature is below 90°, if needed.
- Add the SCOBY and kombucha.
- Cover the jar with breathable fabric and secure with a rubber band.
- Place it somewhere dark with a temperature between 75-85°. (Use a heating pad under the jar if necessary.)
- Let it ferment for 7-10 days. The liquid should be a light golden brown after it ferments, and taste sour.
- You can drink it right away or do a secondary ferment in bottles, with or without flavoring.